Ultimate Guide to Integrating Zapier with WordPress Form Plugins
You’ve just designed the perfect form that’s going to hook your leads like fish at the end of a line, and you’re ready to reel them in.
But what happens when the responses come flooding in? Who’s going to end up with the task of copying and pasting all those leads from your forms to your Salesforce, e-mail list, or even Trello?
With Zapier and a quality WordPress form plugin you can automagically categorize the data captured by your site and share it with over 5,000 other applications.

Sounds difficult and super technical, right? Zapier provides this level of integration to users with almost no skill. And in this post, we’ll look at what Zapier is, how to set up and test your first zap, and how to integrate your WordPress form with Salesforce or any of the +5,000 web apps built to work with Zapier. So let’s dive in!
Continue reading, or jump ahead using these links:
- What is Zapier?
- What can you do with your WordPress form?
- How to connect your WordPress form to your Salesforce account using Zapier
What is Zapier?
Zapier is basically a web application that helps you automate the process of moving information from one app to another, by creating a bridge so that both apps can “talk” to each other. For example, you can send information collected from Forminator or Hustle directly to your Salesforce account.
Zapier’s strength lies in its ability to not just send unordered information from your WordPress form plugin, it is also able to automatically categorize the information it receives, and send it exactly where you decide.
Using Zapier, you can send data from both Forminator and Hustle to:
- Your Salesforce account and Google calendar
- One Google sheet or several
- A Trello board
- Your Dropbox account
- Acuity Scheduling
- Manychat
- …and hundreds more
Some forms are able to seamlessly integrate with a number of popular web services without the help of Zapier. For example, Forminator allows you to seamlessly share your WordPress-acquired data with Mailchimp, Google Sheets, Trello, Active Campaign, Campaign Monitor, Aweber, and Slack. For other applications, Zapier is available as the most networked guest at the party, to help you connect your WordPress plugin form to around 1200+ more services.
What can you do with your WordPress form?
If you’re wondering about what sort of Zapier integrations you can achieve with that WordPress form that’s on fire, here are some automation your list can handle using Zapier:
- Create a new customer in Stripe
- Create a new lead in Salesforce
- Add a lead to a campaign in Salesforce
- Send an email from your Outlook account
- Create a new task or project in Asana
- Update a row in a Google spreadsheet
- Find a contact profile by exact match email in ClickFunnels. Optionally add a new one if no exact match is found.
- Add a reminder for yourself or a teammate in Slack
- … and lots more.
So as you can see, the possibilities of what you can do with your WordPress form are endless. Now let’s check out the setup process.
In this example, we’ll explore how to create a new lead in your Salesforce account with the information submitted via your WordPress form using Zapier.
For the purpose of this tutorial, we’ll be using Forminator, our free form plugin, to collect your leads.
However, this tutorial is beneficial for any Zapier-integrated WordPress form plugin… so keep reading! You can get Forminator free on WordPress.org or become a WPMU DEV member and try Forminator and our entire suite of marketing, performance, security, hosting, backup, and services at no cost.
How to connect your WordPress form to your Salesforce account using Zapier
#Step 1. Activate the Zapier webhook to connect your form
This section will guide you through the steps required to correctly link your WordPress form to your Zapier account. Once you have set up your WordPress form correctly, you should end up on a page asking you to enter your webhook URL.
Set up your form in Forminator
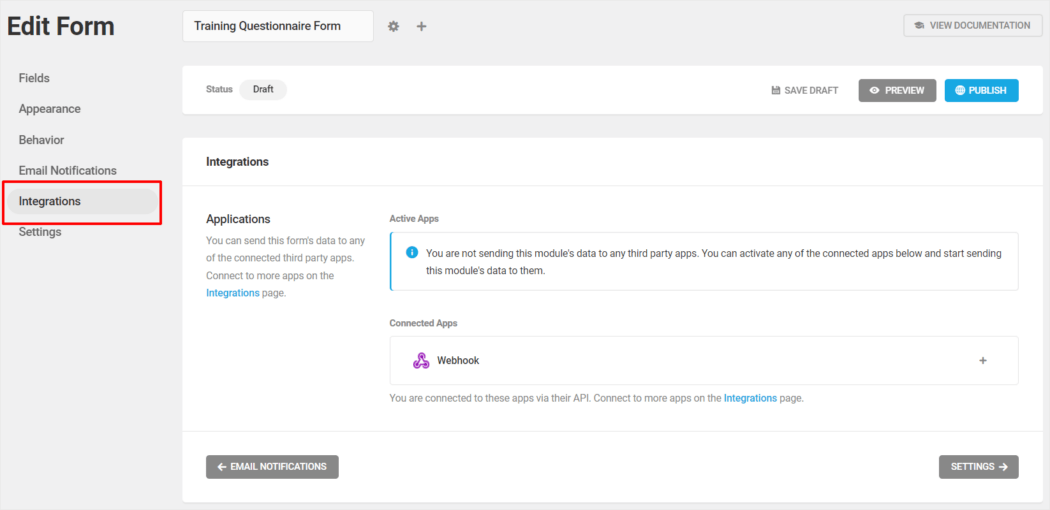
Go to your Forminator form on WordPress, and click on Edit > Integrations.

On the Integration page, scroll down to the Available Apps > Webhook section and click on the “+” sign to integrate Forminator with Zapier.

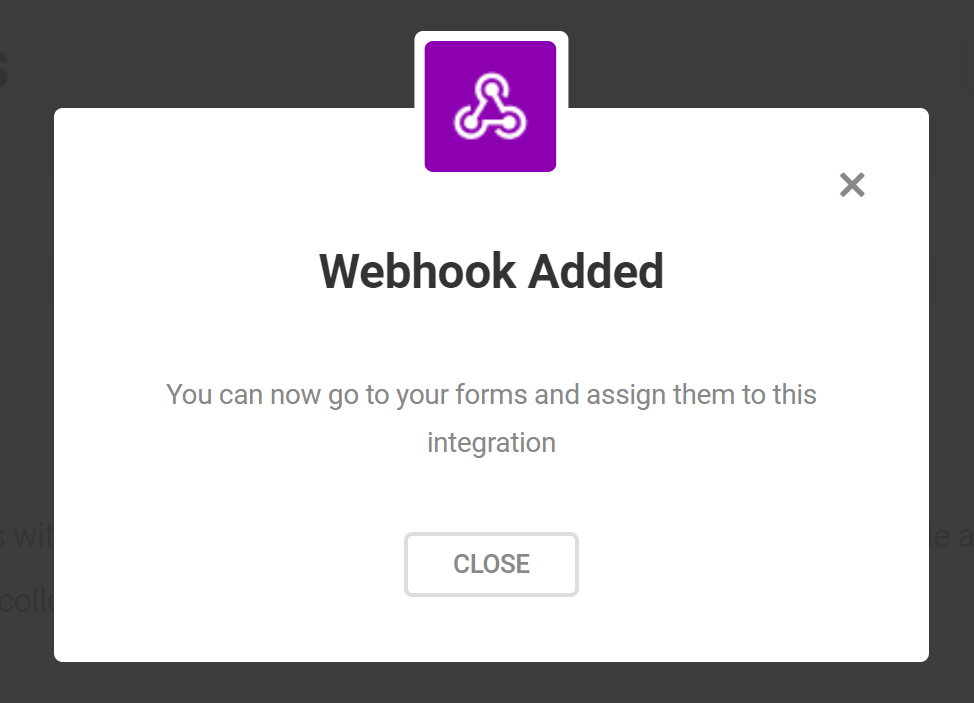
You will get a pop-up asking you to “Activate Webhook.”
Click on the button to integrate forms, polls, and quizzes with automation tools using webhooks.

After activating the Webhook feature, close the pop-up window.

FREE EBOOK
Your step-by-step roadmap to a profitable web dev business. From landing more clients to scaling like crazy.

FREE EBOOK
Plan, build, and launch your next WP site without a hitch. Our checklist makes the process easy and repeatable.
Add your webhook integrations from the Edit Form > Integrations screen.
#Step 2. Set up a Zapier webhook
Just follow the steps as shown in our documentation to create a Zap and set up your Zapier webhook.

#Step 3: Create an action in Zapier
To set up a Zap for triggering an action in Salesforce, log into Zapier, and in the Dashboard, click on the ‘+ Create Zap’ button.
Search for Salesforce using the autocomplete Search field.

Select an event to trigger your action. For example ‘New Record’.

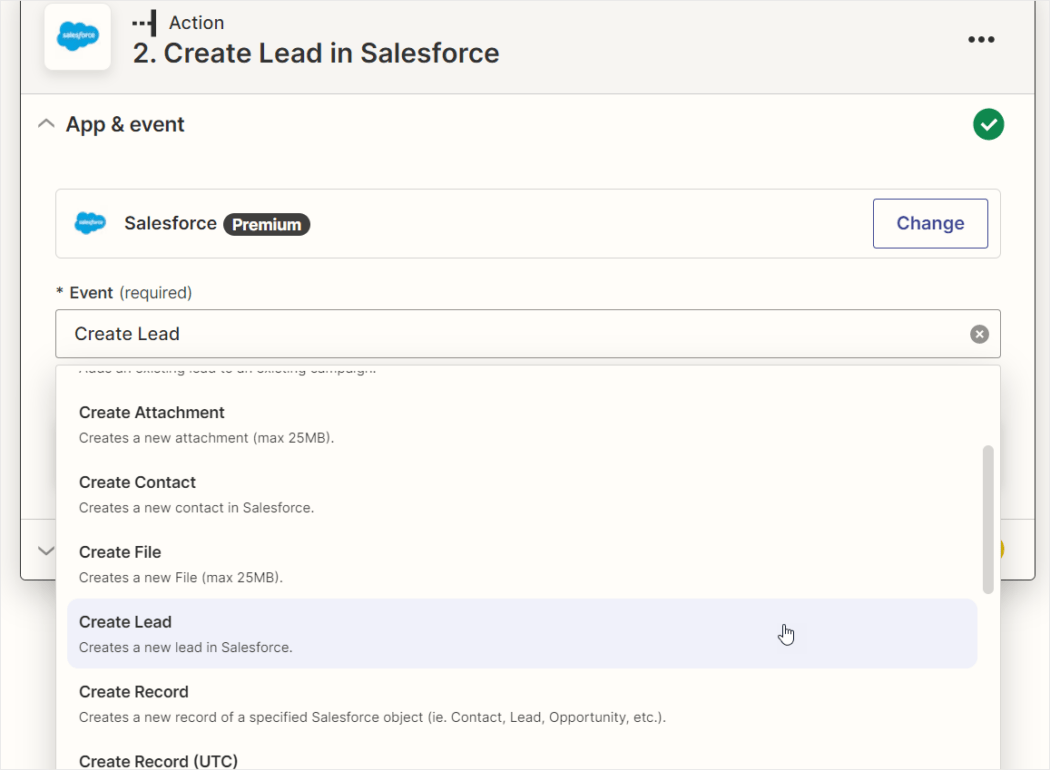
Now, it’s time to set up the action that you want the Trigger to lead to.
In the Zapier screen, click on the Event field. A dropdown list will display offering various options of what to do with your data. You can create a new lead, add a lead to an existing campaign, create a custom object, add a contact to a campaign, create a new contact, etc.
You also have the option to search for existing accounts using a field and any value you choose.
Select the action you desire. For this example, we want to create a new lead in Salesforce using the information provided in the forms, so we’ll select ‘Create Lead.”
In the next step, you will need to add your Salesforce account by logging into it, then clicking “Continue.”
You will now have the option to match the fields in the Salesforce form with the fields in your Forminator form by selecting corresponding fields using the “+” sign. Add as many fields as are available on your form, and when finished, click “Continue”.

#Step 4. Test your Zap
- On the action tab (bottom left), click on “Test this step”. Ensure you have filled out all the information that is required on this page. For this step, you will need to actually type the information required in the fields as you may not be able to “pull” information from your lists at this point.

- Scroll to the bottom and click “Continue”.
You should get confirmation that the test was successful. If this step is not successful, look through your list again and ensure that you have valid information inside the fields – for example, you have an actual e-mail address inside the e-mail fields, etc. - If all works well, don’t forget to turn the Zap on to start sending leads automatically to your Salesforce account (top right corner of the same page)
This guide shows you how to easily integrate one form with the Salesforce app, using a free, basic Zapier account.
The possibilities of what can be done with Zapier are endless, especially with a premium account. You can maximize your productivity by automating multiple integrations with one trigger.
For example, once a form is filled on your website, you can add a lead to your Salesforce account, send the same lead to your email list, and send your team a Slack notification.
All you need to do is click the “+” button between the steps in your Zap.
Your powers have been granted!
So easy! If you’ve read this far and still haven’t downloaded Forminator or Hustle, what are you waiting for? Get started for free with Hustle and Forminator on WordPress.org or start your WPMU DEV membership 100% risk-free.
Congratulations on your newly-acquired super-zap-powers. I hope you have found this tutorial helpful for learning how to use Zapier to integrate your WordPress forms with your favorite web applications.
Tags:
Aileen Javier Aileen has over 10 years of experience in content writing and content marketing. She’s handled content teams, planned editorial calendars, and managed projects. She’s also written blogs, web copy, social media posts, and email newsletters for brands in different industries.