DDoS Protection Guide – How to Help Protect Your WordPress Site From Attacks
A DDoS attack on your WordPress site can grind it to a halt and, over time, make it inaccessible to your users. They’re a common attack that wreaks havoc on vulnerable WordPress sites.
The good news? DDoS attacks can be prevented if you know how to stop them. As you’ll see, it’s not that difficult, especially with the help of a CDN, our security plugin, Defender, and a dash of good hosting. Plus, you may have a lot of precautions in place already.
As DDos attacks continue to increase at a staggering rate disrupting services across all industries, causing huge financial losses to businesses and governments, and threatening growth markets like eCommerce, it’s worth taking precautions now and doing what you can to prevent them.
This article is a tiered security approach of a system that will help prevent DDoS attacks on your WordPress site. We’ll be going over:
-
- What a DDoS Attack Is and Why They Happen
- Damage that DDos Attacks Can Do
- The Difference Between a Brute Force Attack vs. DDoS Attack
- How to Help Protect Your Site Against DDoS Attacks with Defender by:
- Disabling Rest API with a Plugin
- How to Activate WAF in The Hub
- DoS vs DDoS
- Why You Should Use a Good CDN
By the time you’re done reading this, you’ll be able to put the smackdown on any DDoS attacks, and they’ll be DOA once they try to get to your WordPress site.
What a DDoS Attack Is and Why They Happen
A DDoS attack (Distributed Denial of Service attack) is a cyber-attack that attempts to disrupt the normal traffic of a specific server, service, or network.
It does this by overwhelming the target or its close infrastructure with a flood of traffic. The ultimate goal of the attacks is to slow down and eventually crash the targeted server.
There’s a limit to every server, and your WordPress site can only handle so many simultaneous visits before it begins to crumble under pressure.

DDoS attacks evolved from DoS (Denial of Service) attacks. The difference is DDoS takes advantage of multiple machines or servers that are compromised across different regions.
The compromised machines form a network, often referred to as a botnet. Then, each machine that’s affected acts as a bot and attacks the targeted server or system.
This allows them to go unnoticed for some time and cause as much damage as possible before they’re blocked.
So Why Do They Happen?
Good question. There’s a variety of reasons…
One cause of them is for the sheer fun of it. A technically savvy person may just be having fun disrupting your site.
Or, it could even be to blackmail someone for ransom money, for political reasons, or to harm a competitor. It might even be for revenge.
An attack can occur for almost any reason, whether for fun, money, or something else. It boils down to the motivation of the attacker.
They can happen to individuals or major companies. There have also been some pretty famous DDoS attacks. Recently, Google was attacked in 2017, and AWS had a DDoS attack in February of 2020.
So, big or small, attacks happen. They’re on the rise, and it’s vital to protect your WordPress site as much as possible.
Damage that DDos Attacks Can Do
DDoS attacks aren’t pretty, and they can leave some devastation. The main thing they can do is make a WordPress site inaccessible or reduce the site’s performance. A DDoS attack can create a loss of business and a poor user experience.
Plus, it can cost a lot of money to mitigate the attack by hiring support or security service.
The Difference Between a Brute Force Attack vs. DDoS Attack
I’m sure you’ve heard of a brute-force attack. Like DDoS, it’s another form of an ambush on your website. However, they’re both different.
A brute-force attack is a trial and error method where hackers try to guess credentials or encrypted data (e.g. passwords) through a pretty extensive effort to guess correctly. It’s considered one of the most popular attacks out there for hacking a WordPress site.
The key difference between DDoS and a brute-force attack is the goal.
DDoS attacks overwhelm a website intending to devastate it, where a brute-force attack wants to obtain admin access. When accessed, a hacker will often try to steal personal data, redirect legitimate users to fake websites to steal their personal information, or install malicious software to infect customers and administrators’ computers.
WordPress allows unlimited login attempts by default, so it’s crucial to prevent brute-force attacks by limiting the number of attempts a user gets.
And as you’ll see, a lot can be done against DDoS and brute-force attacks with the help of a plugin, like Defender.
How to Help Protect Your Site Against DDoS Attacks with Defender
Our answer to security, Defender, can help handle DDoS attacks with just a few security modifications that can be done in a few clicks.

Keep in mind that Defender can’t completely stop a sustained or significant DDoS attack. In fact, no plugin can. It’s more suitable for protection against DoS attacks (a much smaller form of attack).
Attack prevention has to happen at the server level. Simply blocking the IP will not prevent the connection to the server. Even with the response of a 403, there was a connection still made to the server and site.
DDoS prevention is sufficient if the server completely ignores the connection request and appears invisible to the machine sending the request.
This is why additional services are required for complete DDoS protection, like a CDN (which we’ll discuss later).
That being said, we’ll be going through several ways Defender can help with the collaboration of other preventative measures, and you’ll see how you can start protecting your WordPress site against DDoS attacks today.
Disabling XML-RPC
XML-RPC is a system that lets you post on your WordPress blog using favored weblog clients, for example, Windows Live Writer. It’s a remote procedure call that uses XML to encode its calls and HTTP as a transport apparatus.
If you’re using a WordPress mobile app and you want to connect to services, such as IFTTT, or if you want to access and publish your blog remotely, then you’ll need XML-RPC enabled. If not, it’s just another way for hackers to target and exploit your site with a DDoS attack by getting access via XML-RPC.
That being said, if you don’t need it active, it’s worth disabling it.
Defender can disable this in one-click. You’ll see whether it’s enabled or not in Security Recommendations. From there, you can view your issues and see if disabling XML RPC is one of them.

Clicking on the dropdown gives you the option to disable XML RPC with a tap of a button.

Once you click on Disable XML-RPC, you’ll see that it’s in the Resolved area.

And just like that, you’ve upped the protection on your site against hackers trying to access your site by way of XML-RPC.
Enable Defender’s Firewall
Defender’s powerful Firewall helps protect against brute force and DDoS attacks as well. It’s all set up and ready to go right out of the box.
We’ll cover several things that Defender’s firewall can do to ensure your site stays protected.
IP Banning
With Defender, you can permanently ban persistent users trying to cause a DDoS attack by blocking their IP addresses. Once doing so, the IP address will stay banned until you manually decide to remove them from the banned list.
From the Firewall area in Defender’s dashboard, you’ll open up IP Banning. Here, you can enter any suspicious IPs that you want to block in the Blocklist. Likewise, any IPs you wish to be exempted from all ban rules can be added to the Allowlist.

You’re able to view active lockouts, customize the message for the user that gets locked out, import & export blocklists, and ban countries trying to cause a DDoS attack on your site.
404 Detection
Activate 404 Detection in the firewall so that IP addresses that repeatedly request pages on your website that doesn’t exist will get blocked.
With it, you can specify how many 404 errors within a specific period will trigger a lockout, how long you’d like to ban the locked out user for, and customize the message for the locked-out user.

You can also add Files & Folders to ban users and bots from accessing or allowing access automatically. Simply add them to the blocklist. Also, you can add them to an allowlist.

FREE EBOOK
Your step-by-step roadmap to a profitable web dev business. From landing more clients to scaling like crazy.

FREE EBOOK
Plan, build, and launch your next WP site without a hitch. Our checklist makes the process easy and repeatable.
Likewise, you can choose what File types & Extensions you want to auto-ban or allow with a blocklist and allowlist.
There’s more to Defender’s firewall, such as customized email notifications about lockouts, storage settings, IP lockout logs, and more. Be sure to check out all about firewall protection in this article.
Disabling Trackbacks and Pingbacks
Pingbacks notify a site when it’s been mentioned by another website. That being said, these notifications can be delivered to any site willing to receive them, which opens you up to DDoS attacks.
That can take your WordPress site down, and you can end up with a massive amount of spam comments.
Taking care of this is simple. Just like disabling XML-RPC, this is a Security Tweak you can make in Defender in one-click by clicking Disable Pingbacks.
As you can see, it takes no time at all to disable.
Disabling the trackbacks and pingbacks is a great preventative measure against minor DDoS attacks and a simple fix.
Disabling Rest API with a Plugin
Disabling REST API can help with Application Layer DDoS attacks. Application layer attacks are a type of malicious behavior designed to target the “top” layer in the OSI model. It’s where common internet requests (e.g. HTTP GET) occurs.
REST is an acronym for Representational State Transfer. It uses HTTP requests to access and use data. That data can get used to GET, PUT, DELETE, AND POST data types, which refers to the updating, reading, creating, and deleting of operations concerning resources.
API, in regards to a website, is code that allows two software programs to communicate with each other. The API lays out the correct way for a developer to write a program requesting services from an application or operating system.
So, REST tech is generally preferred over similar technologies. This is due to REST using less bandwidth, which in return makes it more suitable for efficient internet usage.
By disabling REST API temporarily until the DDoS attack ends, it can help stop it.
REST API can be used by some active plugins. Even if there are no plugins, it can be disabled completely, or temporarily.
A plugin like Disable REST API can help.

It will disable the use of the REST API on your WordPress site to unauthenticated users. Once you activate it, REST API will be inaccessible to your site visitors.
Like with the suggested precautions without Defender plugin, keep in mind that disabling REST API provides only limited protection against DDoS attacks. Your WordPress site is still open to regular HTTP requests.
Also, disabling REST API (and XML-RPC) helps prevent an incoming DDoS attack and helps prevent your site from being compromised and used as a botnet itself to instigate a DDoS attack against other servers.
Just be aware that there can be some risks when it comes to disabling REST API, such as disturbing API services.
How to Activate WAF in The Hub
The Web Application Firewall (WAF) is the first layer of protection to stop hacker and bot DDoS attacks before they get to your WordPress site.
It works by filtering requests against an optimized managed rulest covering common attacks and performs virtual patching of WordPress core, plugin, and theme vulnerabilities.
WAF is a feature that is entirely free for WPMU DEV members who host their sites with us. If you don’t host with us, WAF should be featured in your current hosting provider.
With that being said, I’ll show you where to access our WAF.
All the WAF features are managed in The Hub. The Hub is where you can manage all of your site’s security and easily access Defender’s dashboard.
In the Security dashboard, you can see what type of WAF you currently have.
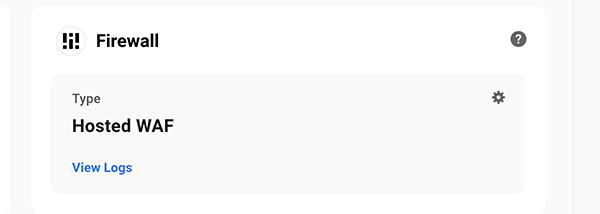
We automatically have our WAF enabled. However, if you need to activate it, it can be done in one-click.

Once activated, you have the options of:
- Entering IPs in the Allowlist and Blocklist
- Enter User Agent in an Allowlist and Blocklist
- Adding URLs to an Allowlist
- Disabling Rule IDs
Here, you have more options you can customize.
WAF is like your own personal security guard for your WordPress site. It can help protect and mitigate you from DDoS attacks — and much more.
For detailed information about WAF, check out our article on what WAF is. Also, get a detailed look at what’s included in our WAF that comes with WPMU DEV hosting.
DoS vs DDoS
It’s important to mention DoS attacks because DDoS attacks evolved from them.
A DoS attack is a type of cyber attack where a hacker will try to render a computer or other device unavailable to its users by disrupting the device’s normal functioning. Its purpose is to let the attacked host and server to deny normal user access and interfere with the normal operation of the system.
Unlike DDoS that uses multiple machines, these attacks are between a single machine and a single machine.
Plugins like Defender can help prevent DoS attacks, and, as I talked about, help with DDoS attacks.
That being said, for relatively larger sites, such as anything commercial, search engines, or government agencies, it’s recommended to use a good CDN to help prevent DDoS attacks.
Why You Should Use a Good CDN
A CDN (Content Delivery Network) is a network of servers distributed around the world. The servers store cached copies of your images and other files, which shortens the distance your content has to travel to your visitors.
If your WordPress site gets targeted for a DDoS attack, a CDN can help ensure it doesn’t get to the origin server and make your site unavailable. It does this by sending traffic to other servers if one server is hit with more traffic than it can contend with.
Because of this, your traffic and you won’t notice a thing.
A CDN helps ensure your WordPress site is up-and-running and prevents any downtime — which can negatively affect your site. It also not only boosts page speed but improves security against threats like DDoS attacks.
We have our own CDN here for WPMU DEV members via Smush for images and Hummingbird for theme resources. It leverages the StackPath network complete with 65Tbps total capacity, which is 50x bigger than the largest DDoS attack publicly reported to date. Enabling our CDN provides built-in, always-on Layer 3-4 protection on files the CDN serves, in every edge location.
With the 10s of thousands of websites we host, larger DDoS attacks that would require a CDN or Proxy service is rare. But when it happens, to mitigate in the middle of an attack is significantly harder than being fully prepared.
For this reason, high traffic and eCommerce sites will need increased levels of protection than small business sites or blogs.
Like anything, you have to judge the actual risk with the costs.
So, for medium to high DDoS prevention, a paid service like Cloudflare can work by acting as a proxy.

When it identifies a DDoS attack, it reroutes the normal traffic to your server and prevents the DDoS connections from ever reaching it. They have an unmetered 51 Tbps capacity to overwhelm from a DDoS attack.
Cloudflare has the most number of ‘High’ ratings compared to the other six DDoS vendors across 23 assessment criteria in the 2020 Gartner’s ‘Solution Comparison for DDoS Cloud Scrubbing Centers’ report, so it’s rated up there in our book as a good solution.
For more on CDNs, check out our guide on picking the best CDN for WordPress.
Don’t Lack Protecting Your WordPress Site From a DDoS Attack
As you can see, DDoS attacks can be less of a threat with the right precautions in place. Simple measures can help prevent them, such as a security plugin like Defender, hosting, and a CDN like Cloudflare.
With all of these tools, you won’t lack protection from any DDoS attack that a hacker tries to attempt on your WordPress site.
Whether the person trying a DDoS attack is just having fun or trying to annoy you, stop the mayhem before it starts.
For more security tips, check out our Ultimate Guide to WordPress Security and How to Easily Secure Your WordPress Site for Free.
N. Fakes Nathanael Fakes is a blog writer and cartoonist at WPMU DEV. He’s worked with WordPress for over a decade. Beyond WordPress, he’s a published author, syndicated cartoonist, and donut enthusiast. Connect with Nate on Instagram and learn more about his work on his comics website.