How To Create A WordPress Post-List Wonderwall – The Bounce Pop
In this mini-series on using featured images to build a post-listing wonderwall, we’ve card-flipped and we’ve colorized. In this final instalment, it’s my personal favourite the Bounce Pop.
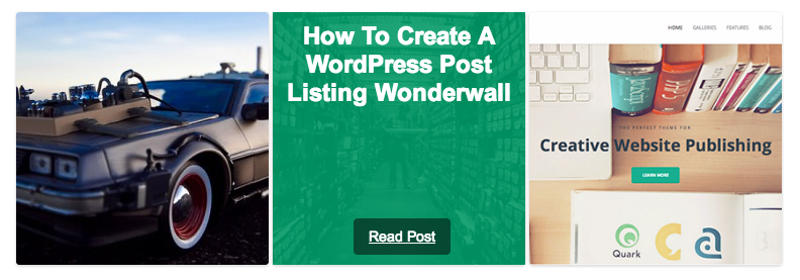
This technique hides the title and a “read more” button behind the featured image and then brings it forward on hover – making the background expand beyond the image before “popping” back to the image size.
Sounds complicated but it’s a cinch to implement.
-
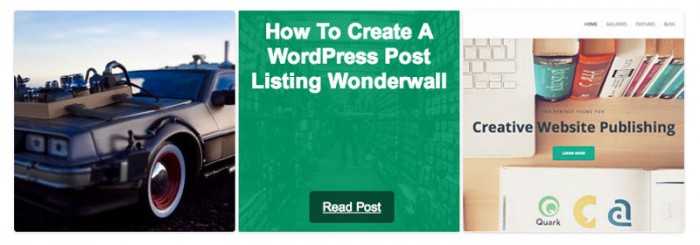
The Bounce Pop – visually obvious post selection
The best example of this visual effect is brilliantly illustrated by the beautiful Origin theme from Elegant Themes. The stunning nature of their implementation clearly has a lot to do with the preparation and selection of the images but the bounce pop is surprisingly effective on even the most mundane set of images.
There’s no javascript required, nor any custom functions, just a few extra CSS statements and a change to the HTML for the post listing pages (home page, category page, archive page).
Step 1 – Create a Child Theme
As always, the customisations are going to be added to a child theme. If you don’t know how to set up a child theme then read this article in the WordPress Codex.
Step 2 – Add the Custom Styling to Style.css
To create your child theme, you had to create a style.css file. Open it up and copy and paste in the following CSS:
.bp-wrapper {
list-style:none;
display:inline-block;
width:250px;
vertical-align:top;
position:relative;
backface-visibility:hidden;
-webkit-backface-visibility:hidden; /* Chrome and Safari */
-moz-backface-visibility:hidden; /* Firefox */
-ms-backface-visibility:hidden; /* Internet Explorer */
}

.bp-wrapper h2 {
margin: 10px;
font-size: 24px;
}

.bp-button {
padding:10px 15px;
background-color:rgb(0,0,0);
background-color:rgba(0,0,0, 0.5);
border-radius:4px;
color:#fff;
position: absolute;
bottom: 10px;
left: 80px;
}

/* set-up image description container */
.bp-wrapper .bp-post-details {
position:absolute;
width:250px;
top:0;
color:#fff;
background-color:rgb(17,153,105);
background-color:rgba(17,153,105, 0.9);
height:250px;
text-align:center;
font:14px arial;
padding:0px;
opacity:0;
z-index:10;
}

/* initiate animation when hovered */
.bp-wrapper .bp-post-details:hover {
opacity:1;
animation: bounce 0.4s ease-in-out;
-webkit-animation: bounce 0.4s ease-in-out;
-moz-animation: bounce 0.4s ease-in-out;
-ms-animation: bounce 0.4s ease-in-out;
-o-animation: bounce 0.4s ease-in-out;
}
/* timelime animation */
@-webkit-keyframes bounce {
0% {
-webkit-transform: scale(1);
}

50% {
opacity: 1;
-webkit-transform: scale(1.1);
}

100% {
-webkit-transform: scale(1);
}
}

@-moz-keyframes bounce {
0% {
-moz-transform: scale(1);
}

50% {
opacity: 1;
-moz-transform: scale(1.1);
}

100% {
-moz-transform: scale(1);
}
}

@-o-keyframes bounce {
0% {
-o-transform: scale(1);
}

50% {
opacity: 1;
-o-transform: scale(1.1);
}

100% {
-o-transform: scale(1);
}
}

@keyframes bounce {
0% {
transform: scale(1);
}

50% {
opacity: 1;
transform: scale(1.1);
}

100% {
transform: scale(1);
}
}
You’ll need to set the sizes according to how you want your page laid out. The example CSS above is assuming a height and width of 250px, so if you want to use something different then be sure to insert your own sizes. You’ll also need to change the positioning of the button.
Also worth noting is the transform:scale(1.1) statement. This is the “bounce” size, so when the overlay is brought forwards it expands to 110% of its normal size before “popping” back to 100%. If you want to change the extent of the bounce then simply change the value of the scale.
And if you want to change the color of the overlay (currently set to the green in the feature image) then alter the background-color attribute for the .bp-wrapper .bp-post-details class. You’ll see two values specified: rgb and rgba. Not all browsers understand rgba so setting both sets a fallback.

FREE EBOOK
Your step-by-step roadmap to a profitable web dev business. From landing more clients to scaling like crazy.

FREE EBOOK
Plan, build, and launch your next WP site without a hitch. Our checklist makes the process easy and repeatable.
The ‘a’ in rgba is the alpha-channel which sets the opacity (1 is solid, 0 is transparent). Unlike the opacity attribute which is inherited by an element’s children, the alpha-channel only applies to element being styled.
Step 3 – Change the Content.php Template to Generate the HTML
The last step is to ensure the required HTML is output for the listing pages. To do this we only need to alter one template, content.php, to output different HTML for a post if the home page, a category listing or an archive page is being generated.
Copy content.php from the parent theme to the child theme. Open it and add this code immediately before the <article> tag:
<?php
if ( is_category() || is_home() || is_archive() ) { ?>

<article class="bp-wrapper">

<a href="<?php the_permalink(); ?>"><?php echo get_the_post_thumbnail( $post->ID, 'homepage-thumb' ) ?></a>

<div class="bp-post-details">

<h2><?php the_title(); ?></h2>

<a class="bp-button" href="<?php the_permalink(); ?>">Read Post</a>

</div>

</article>

<?php
} else { ?>
Close the if statement by adding the following to the bottom of the template:
<?php
} ?>
Step 4 – Create Appropriate Image Sizes
The chances are that you won’t have appropriate image sizes for your post-listing wonderwall. You’ll notice in the code above that I’ve used a size name of homepage-thumb when calling get_the_post_thumbnail, so obviously we need to set this up.
Whilst you can add coding to generate new image sizes, there are plugins available that make it a simple task. Simple Image Sizes will allow you to either resize the default ‘thumbnail’ or set a new size. We’ll go for the latter.
- Install the plugin and click on Settings in the Plugin actions.
- On the settings page click on Add a new size of thumbnail
- Enter the new name in the textbox (eg. homepage-thumb) and click on Validate image size name
- Enter the required dimensions and add a public name – this is the name you’ll need to use in the call to get_the_post_thumbnail
- Click on Crop as we want to ensure that the images are always the dimensions you’ve specified
- Click on Validate

You’ll now see your new size added to the table of thumbnail sizes.

Ensure that the new size name is selected and that Posts is selected in the post type list and click on Regenerate Thumbnails.
This will create a new set of thumbnails for the selected thumbnail sizes.
Activate and Test
You should now be ready to go. Activate your child theme and head to the home page. You should now be presented with a feature-image driven post-listing with a bounce pop affect on hover.
So, that’s three different approaches to producing a wonderwall that are simple to implement and are far more visually appealing than the standard text listing.
I think these techniques have real potential for tablet users.
But What Do You Think?
I’m interested in what you think. Is image based navigation the future or is it simply a gimmick? Let me know in the comments below.
Code Credits: Victor Ivanov