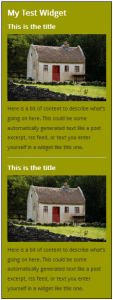
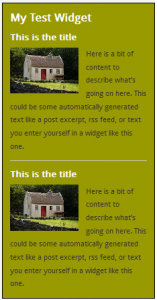
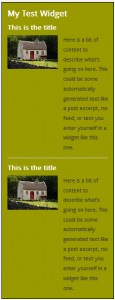
How to Add Custom Styles to WordPress Widgets

WordPress widgets; ooh… we love ’em, don’t we?
The functionality and flexibility that WordPress widgets can add to our blogs and sites is unmatched (imho) by other platforms. Just do a quick search of the WordPress repository for widget, and you’ll find over 1000 plugins that can include a new widget for your blog!
But, regardless of the quantity and quality of WordPress widgets available, every once in a while, we install a WordPress plugin with a widget that doesn’t quite fit the look and feel of our site. Sometimes, (sorry designers), the built-in styling looks just awful.
Then again, there are times when we’d simply like a specific widget to stand out from the rest in our sidebar. This little tutorial will give you a few basic tips on how to
- just tweak individual WordPress widgets a little bit
- customize things by removing some of the information displayed in the widget
- ensure the same custom style is applied to all widgets in your sidebar, or throughout your site
- re-arrange how the information is outputted by a widget
Note that for that last point, we won’t be touching any plugin files or editing any php code. All our customizations will be done via CSS in the style-sheet of our theme or child-theme. That means that the order in which the various elements are called by the widget code won’t change. We can, however, do a bit of pretty nifty stuff with CSS alone.
For the purposes of this tutorial, we’ll be using a simple text widget so you can get the hang of things. Once you’re familiar with how easy is actually is to get your WordPress widgets looking the way you want, you’ll have a ball creating custom styles for almost any widget on your site.
Create a test widget
Go to “Appearance” > “Widgets” in your WordPress back-end and drag a text widget to your sidebar, or any other widget area where you’d like to play around a bit. Give your widget any title you like, add the following to your widget and Save.
<div class="my-entry">
<div class="my-title">
<h4>This is the title</h4>
</div>
<div class="my-image">
<a href="http://www.flickr.com/photos/kevinmcmanus/3956021578/" title="Thatched roof cottage by K Mick, on Flickr"><img src="https://farm3.staticflickr.com/2431/3956021578_8579b5943c_m.jpg" width="240" height="161" alt="Thatched roof cottage"></a>
</div>
<div class="my-content">
Here is a bit of content to describe what's going on here. This could be some automatically generated text like a post excerpt, rss feed, or text you enter yourself in a widget like this one.
</div>
</div>
The above code will generate a widget on your site similar to the image below:

This is a very basic display that inherits the base sidebar styles in the theme style-sheet. While we do have full control over the content in this widget (we just entered it manually), let’s pretend for now that it’s generated by some plugin. That’s also why we added div containers around the image and the content, ‘cuz most plugins will enclose elements in some kind of container for styling purposes (we may not need to use them, but they’re there for our exercise). Now let’s make our test widget stand out from all the others on our site.
Styling a single widget
In the window in which you are viewing your site, launch your browser’s developer tools. For tips and links to documentation of popular browser developer tools, see “Tip #1” of this article: 5 Tips to Organize Your WordPress Theme Stylesheet and Make it Easier to Navigate. (For the rest of this article, I’ll be referring to tool names found in Firebug for Firefox.)
Using the “Inspect Element” tool, highlight the text widget you just created. You should see something like the image below:

See where it says “id=”text-5” in the html window on the left? That’s the ID of the text widget we just created. That ID is what is going to help us create styles that will be specific to that particular widget. So, in all the custom styles we will be adding to our style-sheet, they will be preceded by that ID, ensuring that the styles will be applied only to that widget.
For the rest of this exercise, we’ll be adding some custom styles to our site. There are 3 ways we can do this:
- Open your theme/child-theme’s style-sheet in your favorite text editor (you will need to re-upload the edited file via FTP)
- Use the theme editor in your WordPress admin panel
- Use the new “Custom CSS module” in Jetpack. For more on this new feature, see Jetpack 1.7 Adds Custom CSS to the WordPress Dashboard
Got the style-sheet open? Good, let’s start by making our test widget really stand out from the others in the sidebar by giving it different border and background colors. Add the following to your style-sheet:
#text-5 {
  border: 1px solid #000000;
  background: #999900;
}
You should see something like the image below. Go ahead and play around with the border thickness, border color and background color until you get it looking the way you want.
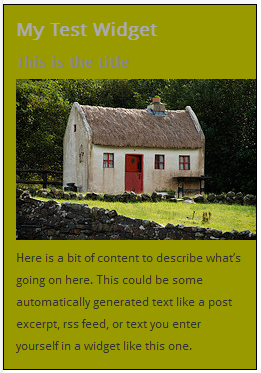
We can also see that the image we added from Flickr.com isn’t quite right for our sidebar (it’s preset in the embed code at 240×161 pixels). We could cheat and modify the dimensions directly in the embed code but, as we’re pretending this widget is generated by a plugin, we won’t do that here. So, here’s an easy way to ensure that any images that appear in our customized widget fit just right:
#text-5 img {
  width:100%;
  height:auto;
}
The width:100%; declaration ensures that larger images will be resized to fit exactly the space available in their parent container. The height:auto; ensures that the height will remain proportionate to the original. Now you should see something like this:

The color of the headings isn’t right either for the background color we added earlier, so let’s make them easier to read by adding the following to our style-sheet:
#text-5 h3, #text-5 h4 {
  color:#ffffff;
}
That would give you something like this:
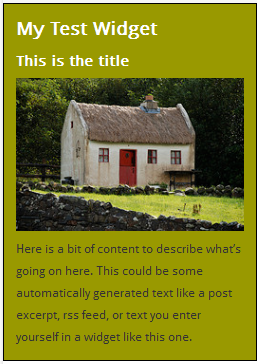
You can see in the examples above how easy it can be to add custom styles to your WordPress widgets simply by targeting the ID of the widget (#text-5 in our examples), then appending the appropriate elements to the selector. Up til now, we’ve been customizing the look of the widget content. Now, let’s shift things into another gear and change how the content is displayed; the layout.
Changing the widget content layout
For this part of our exercise, we’ll be using some display and/or float properties. (For more on display, float and other style rules, see the helpful links at the end of this article.) Let’s first add a bit more content to our test widget so we can really see the impact of our changes. To simulate multiple entries generated by a plugin, we’ll copy what we already have, and add it in again with a horizontal rule between the 2 entries. Change the content in your test widget to the following and Save.
<div class="my-entry">
<div class="my-title">
<h4>This is the title</h4>
</div>
<div class="my-image">
<a href="http://www.flickr.com/photos/kevinmcmanus/3956021578/" title="Thatched roof cottage by K Mick, on Flickr"><img src="https://farm3.staticflickr.com/2431/3956021578_8579b5943c_m.jpg" width="240" height="161" alt="Thatched roof cottage"></a>
</div>
<div class="my-content">
Here is a bit of content to describe what's going on here. This could be some automatically generated text like a post excerpt, rss feed, or text you enter yourself in a widget like this one.
</div>
</div>
<hr/>
<div class="my-entry">
<div class="my-title">
<h4>This is the title</h4>
</div>
<div class="my-image">
<a href="http://www.flickr.com/photos/kevinmcmanus/3956021578/" title="Thatched roof cottage by K Mick, on Flickr"><img src="https://farm3.staticflickr.com/2431/3956021578_8579b5943c_m.jpg" width="240" height="161" alt="Thatched roof cottage"></a>
</div>
<div class="my-content">
Here is a bit of content to describe what's going on here. This could be some automatically generated text like a post excerpt, rss feed, or text you enter yourself in a widget like this one.
</div>
</div>
You should now see something like this on your site:
FREE EBOOK
Your step-by-step roadmap to a profitable web dev business. From landing more clients to scaling like crazy.
FREE EBOOK
Plan, build, and launch your next WP site without a hitch. Our checklist makes the process easy and repeatable.
Let’s try simply making the images half the width of the widget, and get the content to wrap around them. To do so, we’ll style the parent containers of the images. As we have already added a width of 100% to our images, they will automatically resize to fit their container. Most widget content generated by plugins will have images wrapped in some kind of container. In our test widget, the image container is div class=”my-image”. So to style that container, we can add the following to our style-sheet:
#text-5 .my-image {
  float:left;
  margin:0 1em 0 0;
  width:50%;
}
Now you should see something like this on your site:
If you’d prefer a layout with images to the right, change the code you just added to the following and you’ll see something much like the image below:
#text-5 .my-image {
  float:right;
  margin:0 0 0 1em;
  width:50%;
}
In some instances, we may want the content of our WordPress widgets to display in distinct columns. The display property allows us to do that by mimicking good ol’ tables and table cells. First, we should tell our widget that we want its content to behave like a table by adding display:table; to it. The style rule for your test widget should now look like this:
#text-5 {
  border: 1px solid #000000;
  background: #999900;
  display:table;
}
Next, we’ll add a style rule to the my-image container, and create a rule for the my-content container so they behave like table cells:
#text-5 .my-image {
  display:table-cell;
  float:left;
  margin:0 1em 0 0;
  width:50%;
}
#text-5 .my-content {
  display:table-cell;
}
Viewing your site, your test widget should now look much like this:
Evidently, this technique may not be ideally suited to WordPress widgets in narrow sidebars where there’s a lot of text beside a single image in each entry. However, it can be useful to re-arrange text, links or images in wider widget areas such as full-width footer widgets.
Hiding some of the widget content
There are times when a widget displays a bunch of information in each entry, some of which we don’t necessarily need or want. Depending on the plugin used, there may not be a built-in setting or option available to hide or display certain elements. There’s an easy solution to that with the display property.
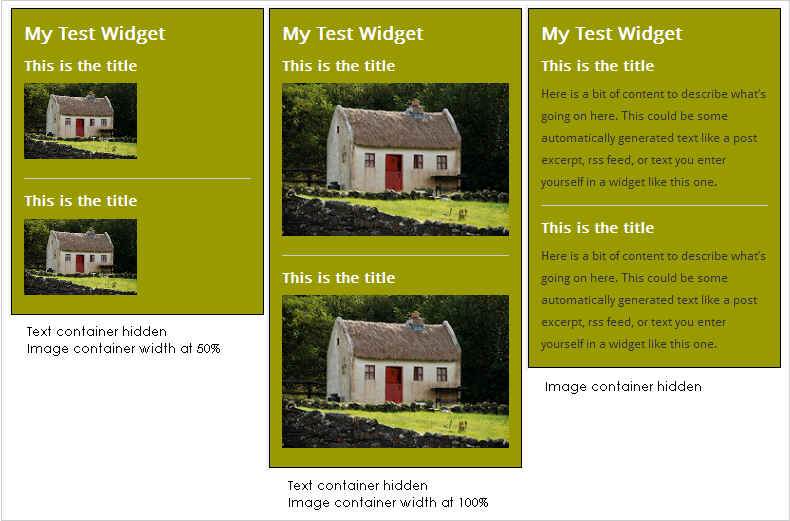
Let’s say we want to remove the text from each entry in our test widget and show only the images. We would simply apply display:none; to the appropriate container. The container for our test widget text is my-content, so the style rule would look like the following (you’ll need to remove the style rules for the my-image container to get the images back to full-width for this exercise):
#text-5 .my-content {
  display:none;
}
To hide the images and display only the text, we would apply the display rule to the image container instead like so:
#text-5 .my-image {
  display:none;
}
Depending on what we’ve hidden, our test widget would now look like one of the images below:
Applying custom styles to groups of widgets
Let’s say we want all the widgets in our sidebar to inherit the same custom styling. Rather than preceding style rules with the ID of a specific widget (such as #text-5 from our test widget), we would precede them with the ID of the sidebar and target the widgets like so:
#sidebar .widget {
 style rules here...
}
If we want to apply the same rules to all our sidebar widget images, our CSS would then look like this:
#sidebar .widget img {
 style rules here...
}
To apply custom CSS to all the widgets in our site’s footer instead, we would target the footer ID like so:
#footer .widget {
 style rules here...
}
To apply custom rules to ALL the widgets on our site, we would simply target the widget class like so:
.widget {
 style rules here...
}
Tips to override stubborn theme styles
Depending on the complexity of your chosen theme’s style-sheet, custom styles for your WordPress widgets may not “take” immediately. In other words, some built-in theme styles may take precedence and override your custom stuff. If this happens, there are 2 ways to ensure that your custom styles override whatever may be present in your theme’s style-sheet.
- Increase the specificity of the selector. This is by far the preferred method. To help get you going on CSS specificity, here’s a simple tutorial, and a complete one.
- Use the !important rule. Be careful though, this should be used only if absolutely necessary. See this article at CSS-Tricks.com for a great write-up on how !important can be used wisely.
Other helpful links
- All about the display property
- A tutorial website dedicated to lists, selectors and the float property.
As always, I hope you find use for the tips in this article. If you’ve created a really cool style for your WordPress widgets and want to show it off, go ahead and leave a comment below with a link. I’d love to see your stuff! If you need a hand with a puzzle, ask away in the comments too. Thanks for reading!
Photo credit: Flickr.com – Thatched roof cottage (used in our test widget sample code).
Tags:

