How to Add Author Images to Your WordPress Blog
Have you ever wished you could display the photos of your site’s authors (i.e. their avatars) in a more creative way, such as showing the author’s avatar right beside the headline of each post?
Well, you can. It’s actually not that hard. It just takes placing a few lines of code in your theme.
Uploading an Avatar
Before we get into the code to do this, you should make sure that you have uploaded an avatar. WordPress default doesn’t have a place to upload avatars, but you can get a plugin that will do that, or probably the easiest solution is to go to gravatar.com and upload an avatar there.
The email address you use at gravatar.com should be the same email address you use as your registration address in your WordPress site. (By the way, the avatar you upload at gravatar.com will follow you around the web as long as you are using that same email address. There are many sites that will recognize your Gravatar avatar.)
The Code to Display Avatars / Profile Pictures
There are a number of different pieces of code you could use to display your avatar in WordPress. Here is the one we will use for this example:
<?php echo get_avatar( get_the_author_meta('ID'), 60); ?>
In this case, the number you see there (60) is the size of the avatar. You can simply make that bigger or smaller to suit your needs.
Avatar Appears, but without Style
If you insert the code above into your theme (for example in your single.php file), you should see the photo of that post’s author. The only problem with this is that it simply puts the photo wherever you’ve put the line of code without controlling it in any way.
Controlling the Avatar with Styling
In order to get the photo to line up in a way that looks better, we are going to need to style it with some CSS styling.
In order to do that, first we are going to need to put it in a unique “div” – i.e. its own division, its own section. Here’s a way we can do that.
<div id="author_pic">

<?php echo get_avatar( get_the_author_meta('ID'), 60); ?>

</div>
This creates a new division/section called “author_pic” that is unique.
Important: Make sure your new div is unique. It should NOT have the same name as another div in your theme.
So we now have our div set up, but we still need to style it. We do that by referencing the div we’ve just created (“author_pic”) in the Stylesheet (style.css).
CSS Stylesheet
In the style sheet (Appearance > Edit > Stylesheet (style.css)), we’ll control the div with the style we want. Here’s an example.
#author_pic {

float: left;

margin-right: 10px;

}
First we name it the same as we named the div, but we put a hash tag in front of it first. And we also put the opening bracket.
#author_pic {
Then we tell it we want it aligned to the left.
float: left;
And then, because it’s going to be aligned to the left and therefore is going to have the content (in this case the title and the date) to the right of it, we need to make sure it doesn’t run together as it did originally. And so we are going to say, “Give me a 10 pixel margin on the right-hand side.” … And we’ll go ahead and put in the closing bracket.
margin-right: 10px;

}
Now that we’ve controlled the div with CSS, here’s what we get.


FREE EBOOK
Your step-by-step roadmap to a profitable web dev business. From landing more clients to scaling like crazy.

FREE EBOOK
Plan, build, and launch your next WP site without a hitch. Our checklist makes the process easy and repeatable.
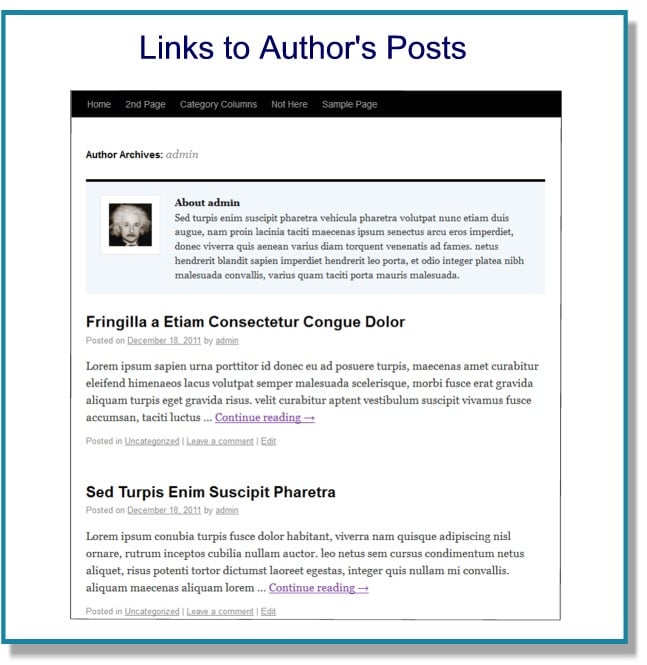
Linking to Author’s Posts
So all of that is looking pretty good. But the avatar that gets inserted is just photo, and that’s it. Many people will probably try to click on the photo thinking they will get more posts from the author or more info about the author.
So let’s go ahead and add a link to the photo that goes to an archive of the author’s other posts.
Our styling is fine, so we don’t need to touch that. But we’re going to need to add more to the code we first inserted.
To make a long story short, let’s just jump to the whole snippet of code.
<div id="author_pic">

<a href="<?php echo get_author_posts_url( get_the_author_meta( 'ID' ) ); ?>" rel="author">

<?php echo get_avatar( get_the_author_meta('ID'), 60); ?></a>

</div>
When we do that, clicking on the photo takes the viewer to the author’s archive page, as we hoped.
Inserting the Photo in Other Places
Where you insert the author’s avatar is up to you, but we’ll run through one more example that some may like to use.
This time we’ll put the avatar at the top of the sidebar. (Appearance > Editor > Sidebar) We’ll also go ahead and keep it linked to the author’s archive page.
<a href="<?php echo get_author_posts_url( get_the_author_meta( 'ID' ) ); ?>" rel="author">

<?php echo get_avatar( get_the_author_meta('ID'), 198); ?></a>
You’ll notice that this is basically the same code as before, but two things are different. The first is that the divs are gone. The reason for this is that the space in the sidebar is so confined, that there isn’t really anywhere for the photo to go (at least not the way I’m using it).

The second thing is I’ve change the pixels from “60” to “198.” I decided that I wanted a large photo to go right at the top of the sidebar, and I wanted it to basically take up the whole space. (Your size may be different, of course, according to your theme.)
And here’s the result.

Style as You Like
These two basic examples should be enough to get you going. And of course there is a lot more you could do with this if you have the CSS know-how. Just remember that you will need to go in an add the code to whichever files you want the avatars to show up in.
Play around with it. It can really add a professional looking touch to your site.
Photo: Author Icon Or Symbol from BigStock
Tags: