Ultimate Guide to WordPress Translation and Localization
WordPress powers more than 15 million websites across the web and I’ve got news for you – not all of them are in English. In fact, one of the reasons the ‘Press is so popular is due to its availability in many languages and the ease with which it can be translated.
What’s even more interesting is the fact that in 2014, the number of non-English downloads of WordPress surpassed the number of English downloads for the first time.
Pair that with the announcement that WordPress plugin and theme directories will be fully localized, making them more accessible and fully translatable for non-English speakers, and it’s easy to see why it’s important to take the localization of WordPress seriously.
If you make your living from WordPress, either by selling themes or plugins, then your work needs to support multiple languages. No ifs, ands, or buts.
And if you happen to be the end-user of WordPress themes and plugins, knowing they include support for your native language is an added bonus.
Today, we’re going to explore just about everything under the sun related to WordPress localization, including:
- Understanding i18n and l10n
- How to Install a Localized Version of WordPress
- How to Localize an Existing WordPress Site
- How to Contribute to WordPress Localization
- How to Prepare Your Plugin for Translation
- How to Prepare Your Theme for Translation
- How to Use the Translated Themes and Plugins
- Plugins for Theme and Plugin Localization
So buckle up and get your translation tools ready. It’s about to get linguistic in here!
Understanding i18n and l10n
When it comes to WordPress and the support for your language, there are two key terms you need to understand:
The first is internationalization. Internationalization, or i18n for short (because there are 18 letters between i and n), is the process by which you as a theme or plugin developer prepare your theme or plugin for translation.
WordPress uses the gettext libraries and tools for i18n.
Here is how it works in short:
- Developers wrap translatable strings in gettext functions
- Source code files are parsed and translatable strings are extracted into POT (Portable Objects Template) file
- POT files are then fed to GlotPress, a collaboration tool for translators
- Translators translate and the result is a PO file
- PO files are compiled into binary MO files, which give faster access to the strings at run-time
This means that no matter what language you use to develop your work, future users (or even developers) can easily translate it into whatever language is required.
The second important term is localization or l10n for short (because there are 10 letters between l and n).
Localization generally happens after internationalization and it’s the process in which your theme or plugin gets translated and adapted for use in a specific language.
As a developer, you will only need to concern yourself with internationalization – making your theme or plugin ready for translation.
While it’s not necessary for you to provide the translation, if you are multilingual, then by all means have a go at it.
With these key definitions out of the way, we can move onto the nitty-gritty of today’s post, including how to install a localized WordPress version or how to convert your existing installation to a localized one; how to prepare your themes and plugins for translation; how to contribute to WordPress localization; and finally, we’ll take a look at some of the best plugins that can help you with localization.

How to Install a Localized Version of WordPress
The easiest way to install a localized version of WordPress is through your web host’s cPanel.
Plenty of hosts allow you to choose the language WordPress is installed in. For most users, this option is usually the easiest one.
If for some reason your host doesn’t allow for this, you will have to do the work yourself.
To see if WordPress is available in your language, visit WordPress.org. If it is available in your language, you will see a yellow notification bar telling you so.
For the purposes of this article, let’s assume you need the French version of WordPress.
The process of installing it is the same as it is for the regular WordPress version so let’s briefly run through the steps:
- Head over to fr.wordpress.org and download the French version of WordPress.
- Using Filezilla (or your preferred FTP client), connect to your web server and unzip the WordPress package to your preferred installation directory – usually public_html
- Create a database for WordPress on your web server and a MySQL user with all privileges.
- Edit the wp-config.php file and add your database information.
- Run the WordPress installation script by accessing the URL in a web browser.
WordPress should now be installed in the French language. If you need more guidance, be sure to check out our more detailed post on the subject, A Guide to the Best Ways to Install WordPress.
How to Localize an Existing WordPress Site
If you already have a WordPress website, chances are you don’t want to be bothered by installing WordPress from scratch.
The good news is, you don’t have to.
The easiest way to do this is to log into your dashboard, click on Settings > General, then scroll down to the bottom of your page to Site Language and select your desired language from the dropdown.

Note that this will only change the language used in the backend of your WordPress site. If your posts are in English, they will remain in English.
Your theme and any plugins you may be using will still be in English.
An alternative way of localizing an existing WordPress installation is by downloading and uploading the .mo language file to your /wp-content/languages/ or /wp-includes/languages/ folder.
You will have to create a new folder called languages in the wp-content directory.
Once you have uploaded all the .mo and .po files that came with your language, the next step is to tell WordPress to use these language files. To do so, open your wp-config.php file and change the following line:
Replace fr_FR with your language and country code. The first two letters are for the language code and the other two letters are for the country code. Check out the full list of language and country codes.
Once you’ve added that text to your wp-config.php file, WordPress will display the admin area in your language.
As with the previous method of changing the language in the Settings menu, only the WordPress administration areas will be in your language. You may still need to translate your WordPress theme or other plugins.

How to Contribute to WordPress Localization
While WordPress is available in many languages, some of them haven’t been fully translated yet. If you are multilingual, why not use your skills to contribute to WordPress localization.
The first thing you want to do is head over to Translate WordPress. If you have an existing WordPress.org account, all you need to do is log in and start contributing to your language.
Before diving into translation, you will want to check out the Translator’s Handbook, which will teach you everything you need to know about translating WordPress, from how to get started to best practices and expectations.
After you have familiarized yourself with the handbook, there are a few different ways you can contribute.
You can become a part of your local team if one exists already for your language. Or you can create a team.

You can help translate WordPress itself, themes, plugins, or apps. Once you’ve decided on your translation project, you can start contributing to it by clicking on Contribute.
You will then be presented with the strings that still need translating. So go forth and translate!
How to Prepare Your Plugin for Translation
Preparing your plugin for translation gives you a far wider audience than simply restricting it to one language or assuming that because it’s in English everyone will know how to use it.
Here’s a look at how to prep your plugin for translation:
1. Set Translation Headers
The first step is adding the translation headers to the plugin headers. The translation headers are the Text Domain and the Domain Path.
The Text Domain denotes all text belonging to a plugin. It’s a unique identifier that ensures WordPress can distinguish between all loaded translations.
The Text Domain must match the slug of the plugin.
Essentially, this means if your plugin is a single file called sample-plugin.php or if the plugin is in a folder called sample-plugin the text domain should be sample-plugin.
It’s worth mentioning that the text domain name must use dashes and not underscores.
The Domain Path is the folder WordPress will search for the .mo translation files.
By default, WordPress searches the plugin directory for the translation files to use. If you leave the translation file at the root folder of your plugin you could wind up with a disorganized plugin structure.
That’s why it’s recommended to create a separate folder for the translation files such as /languages. To inform WordPress about it, you need to use the Domain Path header.
For example, a typical header of a WordPress plugin that has been internationalized would look like this:
2. Load Text Domain
After adding translation headers, we need to load the text domain by using the load_plugin_textdomain() function. This function tells WordPress to load a translation file if it exists for the user’s language. It looks like this:
The first parameter $domain should be the text domain; the $abs_rel_path has been deprecated and should be set to false; finally, $plugin_rel_path is the relative path to translation files.
In the case of our sample plugin, the function would look like this:
The function should be called in your plugin as early as the plugins_loaded action like this:
Now that the Text Domain and the Domain Path header are set, let’s look at how to internationalize a plugin.
We’ll cover translating strings, using placeholders, HTML translation, handling plurals, dealing with disambiguation, and escaping translation strings.
3. Strings Translation
To make a string translatable in your plugin, wrap the original string in a __() function call:
If you want to echo the string to the browser simply use the _e function instead:
Repeat this for every string that you want to translate.
4. Using Placeholders
If you are using variables in strings like the example below, you should use placeholders:
The right way is to use the printf() function:
If you don’t use placeholders, then you are leaving your plugin open to various vulnerabilities, such as translators mistakenly altering the variables or worse, replacing them with malicious code, which could ultimately lead to plugin malfunctions and overall site vulnerability.
5. Translating HTML
One of the biggest areas of confusion when it comes to HTML translations is translating links.

FREE EBOOK
Your step-by-step roadmap to a profitable web dev business. From landing more clients to scaling like crazy.

FREE EBOOK
Plan, build, and launch your next WP site without a hitch. Our checklist makes the process easy and repeatable.
How you handle the translation of HTML links depends on the context the link is in. If the link is separated from the rest of the text then you can wrap it into an _e() function:
If, on the other hand, the link is a part of the paragraph (not separated from text surrounding it), then you can translate it as follows:
6. Handling Plurals
In some languages, you can have multiple plural forms unlike in English where you have only one plural form. This is where the _n() function comes in handy.
This function accepts four arguments:
- Singular – the singular form of the string
- Plural – the plural form of the string
- Count – the number of objects which determine whether the singular or the plural form should be returned
- Text Domain – the plugin’s text domain
An example of the _n() function is below:
Now, let’s break down what all of this means.
The first argument we pass to the _n function is the text that will display when we only have one comment.
The second argument displays the text when the number of comments is greater than one. The third argument get_comments_number() is a function that returns the comment count.
Finally, the fourth argument is the translation text domain.
The function number_format_i18n() converts the comment count to format based on the locale.
Similarly, the date_i18n retrieves the date in localized format, based on timestamp.
7. Handling Disambiguation
In some cases, one term can carry several different meanings and although it may be one and the same word in English it may not be translated the same way in a different language.
In such cases, the _x or _ex function should be used.
The _x() and _ex() functions come with an extra argument: $context.
Using this method you will ensure that the translators see the two comment strings each in a different context and avoid the confusion.
8. Escaping Translation Strings
Translation strings can be escaped by using following functions:
A full list of sanitization and validation functions and their explanation is available at the WordPress Codex.
Once you have gone through every string in your plugin, the only thing left to do is to create the .pot file, which will allow other users to translate the plugin into their own language.
By default, the official plugin repository has a tool for generating the POT file of a plugin which is located on the Admin page of every plugin listing.
Once you upload your plugin to the repository you can click on Admin > Generate POT file and then Get the POT file.
If you don’t want to use the official tool, you can use POEdit. Once you’ve installed it, you can create your .pot file. To do this, go to File > New Catalog.
A dialog box will appear where you need to enter the information for your project, specifically the project name and your language/country as well as the following in the “Plural Forms” box:
Plural Forms: nplurals=2; plural=n != 1;
On the Paths tab, enter the path where the files can be found. Since we used the /languages folder in our example, you’ll need to enter .. (two periods).
Next, you need to tell POEdit which keywords to look for when scanning your files. Enter the following:
__
_e
_n:1,2
_x:1,2c
_ex:1,2c
The :1,2 extension tells POEdit that these keywords consist of two parts: the second argument is the plural. When you include the “c” you’re telling POEdit the second argument is a comment.
After that click “OK” and choose a place to save your .pot file.
Bear in mind that it has to relate to the path you defined earlier.
POEdit will now scan through your files and find all the occurrences of your translation functions and save them into your .pot file.
Now you have the bare minimum for the internationalization of your plugin.
If you know a different language and want to go a step further, you can translate all the strings that POEdit found and save the translation as the .po file.
Be careful in naming your .po file, however. Since Gettext uses the ISO 639 standard for language abbreviations and ISO 3166 for locales you have to keep in mind the language and country codes, as well as the capitalization.
You can find a full list of language and country codes at the following links:
Once you save, POEdit will automatically create a .mo file alongside your .po file.
How to Prepare Your Theme for Translation
The process for preparing your theme for translation follows the same principles as those for the plugins we described above. The difference is that you need to load the text domain in your functions.php file:
How to Use the Translated Themes and Plugins
Once you’ve prepared your theme or a plugin for installation and you want to use them on your site, you need to make a small edit to your wp-config file.
To do so, open up wp-config.php and find the line that says:
In the empty space add the country code and the locale code for your translated language. In the case of French, this bit of code would become”
Save the file and you’re done.
Plugins for Theme and Plugin Localization
We’ve already covered translation plugins here at WPMU DEV, but this time, let’s focus on plugins that help with preparing themes and plugins for translation as well.
While POEdit is a great tool, there are a few plugins that allow you to translate, well, plugins, in your WordPress admin.
WPML
WPML enables you to translate the texts coming from themes and plugins you use in your sites.
By default, WPML doesn’t scan or load these translation files into the database. Therefore, if you want to translate or edit these strings, you first need to scan the translation files of the related theme or a plugin.
Once the theme or plugin strings are scanned you can translate them on the WPML -> String Translation page.
WPML also doesn’t need to access the database to display translations of theme and plugin texts. Because of this, translating theme and plugin texts will have no impact on your site’s performance.
Another great thing about WPML is that it’s fully compatible with a number of plugins — including our own Hummingbird.
Even better, as of release 4.3, WPML has changed the way string translation works. As a result, when used with Hummingbird this translation plugin won’t slow down your site one bit.
WPML comes with three pricing plans – Multilingual Blog, Multilingual CMS, and Multilingual Agency. Prices range from $29 – $159.
POEditor WordPress Translation Plugin
For a more streamlined localization of WordPress themes and plugins, you can use POEditor’s WordPress translation plugin. With this plugin, you can manage the import and export in your POEditor translation projects directly from your WordPress dashboard.
To use the plugin you will need a POEditor.com account which you will need to connect to the plugin after you have installed it on your site. Then enter the API key and you’re ready to start translating by creating a new project, adding a language, and assigning a language file.
The plugin is free and there is a free account option on POEditor, however, you are limited to 1000 strings. Paid account plans start at $14.99/month.
TranslatePress
TranslatePress is an intuitive translation plugin due to its visual translation interface.
You can translate everything you see (text, images, forms, etc.) directly from the front-end of your site.
TranslatePress automatically detects gettext strings coming from themes or plugins. The nice thing is that once you translate gettext strings, these translations will automatically apply to all instances where that string appears.
Also, if a certain plugin has a language pack available, TranslatePress will automatically pre-fill the translations of these strings and display them in the front-end. You can also go through and manually edit them.
TranslatePress is free and available at wp.org. The premium packages include addons like SEO Pack, Automatic User Language Detection, Translator Accounts, and more, and starts at 79 euros.
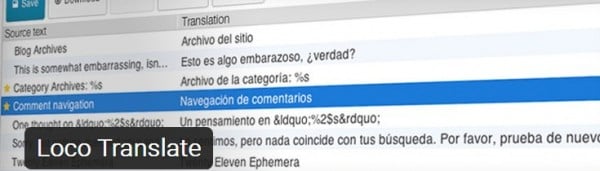
Loco Translate
Loco Translate gives you a built-in translation editor in your WordPress dashboard.
After the installation, you will see a list of all the themes and plugins you have installed as well as any existing translations. Once you find the theme or plugin that you want to translate, simply click on New Language, and then Start Translating.Loco Translate is free for up to 2000 translations. Paid plans start at $5.95/month


Wrapping Up
The number of WordPress users is growing every day. And while a fair number of WordPress users understand English, ignoring other languages is downright foolish.
Preparing your themes and plugins for localization ensures you reach a wider audience and it earns you bonus points with the end-users. And that is a net win.
Tags:
Brenda Barron Brenda is a freelance writer from Southern California. She specializes in WordPress, tech, and business and founded WP Theme Roundups. When not writing about all things, she's spending time with her family.