How to Deploy a WordPress Site to a Cloud PaaS Platform
Earlier this month we featured a post on hosting WordPress in the Amazon AWS cloud and arrived at the conclusion that AWS isn’t viable for the average WordPress user.
An alternative cloud model is Platform as a Service (PaaS), where all the configuration work is taken out of your hands. All you need to do is ensure WordPress itself runs smoothly. This gives you the benefits of the cloud, like auto-scaling and redundancy, without having to manage the underlying hardware yourself.
In this tutorial I’ll walk you through the entire process of deploying WordPress to the open source Cloud Foundry PaaS environment.
There are many benefits to PaaS, such as the fact it mimics the entire application environment in the cloud. So once you have WordPress on your local machine, all you need to do is deploy it. There’s no need to manage hardware and resources or meddle with server configuration and installing software. Everything is pre-configured for you.

Before we dive in, if you don’t want to deal with any of the technical stuff around setting up WordPress then check out our new Managed Hosting! Look up some reviews while you’re at it.
Getting Started
In this guide we’re going to take the following steps:
- Install the command line tools on our local machine
- Set up the MySql database on the PaaS platform
- Download and prepare the WordPress installation
- Deploy WordPress
Installing the Command Line Tools on Your Local Machine
The command line tools for deploying applications to Cloud Foundry are written in Ruby, at least for the latest version. So we need to:
- Install the Ruby Framework
- Install Ruby Gems
- Install the command line tools
Local Ruby and Gems Installation
We need at least Ruby 1.9.3 for this. Download and install the file. Ensure you tick the two boxes in the setup screen to add the Ruby commands to your PATH variables as shown below:

Next, download and extract the development kit.
Installing Cloud Foundry
Navigate to the folder into which you extracted the dev kit and open up a command window at that location. Since we added the “ruby” command to our PATH variable, we can access it from anywhere. Type in the following two commands:
ruby dk.rb init
ruby dk.rb install
When this completes, we can now install the CF command line tool with:
gem install cf
This completes the installation of the Cloud Foundry command line tool.
Setting up the MySql Database
We’ll set up the MySql database on PaaS first. You can sign up for a free trial with Cloud Foundry here. (Try using the Invitation Code: HACKFERENCE to speed things up.) Once you have your login details, open up a command line window and enter:
cf login
After you validate, you have to select the “space” in which to start. You can have several work areas for testing, production, deployment etc. For this example as shown in the screenshot below, I’ve chosen the “test” space.

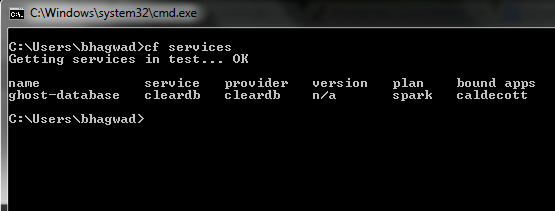
Databases in Cloud Foundry are examples of “services”. We use the “cf services” command to get a list of existing services on the platform. As seen below, I have just one right now.
To create a new MySQL database we type in:
cf create-service
We’re prompted with the type of service we want to create. Here we select No. 2 – ClearDB – which is actually a MySQL package. Depending on the type of account you have, you can now select a plan to go with it. Since this is a free trial account there’s just one, namely the spark plan.

Tunneling to Get the Database Details
In order to set up WordPress, we need to get the details of the database we just created, such as the hostname, database name, username and password etc. To do this, we tunnel using:
cf tunnel
When it asks for which service you want to connect to, just select the one we want, in this case number two. You’ll then see the connection information.

FREE EBOOK
Your step-by-step roadmap to a profitable web dev business. From landing more clients to scaling like crazy.

FREE EBOOK
Plan, build, and launch your next WP site without a hitch. Our checklist makes the process easy and repeatable.

Notice that the hostname has to be extracted from the string on the fourth line of the connection information after the “@” symbol. Make a note of these until you’re ready to plug them into your fresh WordPress install.
Downloading, Configuring and Pushing WordPress
To start, download the latest copy of WordPress and extract it.
Get the Directory Structure Right
For reasons I’ll explain in a moment, place the entire WordPress installation into a folder called “htdocs,” which will nest inside another folder. So if you’ve extracted the files to your desktop, the structure should be something like:
C:\Users\username\Desktop\WordPress\htdocs\..main – WordPress files like wp-config and so on
The “htdocs” folder should be the root of your installation because we’re going to use a Buildpack to deploy WordPress to Cloud Foundry and this is the expected structure.
Plugging in Connection Details into wp-config.php
Next, rename wp-config-sample.php to wp-config.php and enter the database details that we got earlier (as per the screenshot below). I prefer to use Notepad++, but you can use whatever text editor you’re comfortable with as long as it doesn’t perform any formatting of its own:

Deploying WordPress
To deploy WordPress, go to the directory that holds the “htdocs” folder and open up a command prompt there. In other words, when you type “dir” or “ls” or whatever to list the files and folders, “htdocs” should be the only one.
Enter the following command:
cf push --buildpack=https://github.com/dmikusa-pivotal/cf-php-apache-buildpack.git
Cloud Foundry will now ask you a variety of questions. For this test install, here are the options I selected (mostly default):
- Name: The name of our applications. I chose “wordpress-testinstall”
- Memory Limit: I chose the default 256MB
- Subdomain: The default
- Domain: The default
- Create Services: No (We’ve already created our MySql database)
- Bind other services to application? Yes! (This is where we bind the database to WordPress)
- Which Service: Select the number of the MySql install – in this case, No. 2
- Bind another service? No
- Save Configuration? Yes
After this, WordPress should start deploying to Cloud Foundry. Here’s a screenshot of the process:

If all goes well, it should end with a “Push Successful!” notification and give you the URL where your app is now available. This will be the selected subdomain and the domain, in this case wordpress-testinstall.cfapps.io. Visit that URL to see the initial set up screen for WordPress below:

Now just enter your site title, username and password like you would for any regular WordPress installation, save your details and click “Install WordPress” to get to the final screen.

And here’s WordPress running on PaaS:

Things to Watch Out For
The biggest drawback of PaaS so far is that there is no persistent file storage, meaning that that any file changes to your installation need to be made on your local machine and then redeployed with another “push” command. If you make a file change directly on a live site (for example, installing a plugin), those changes will be lost if the instance is ever restarted or destroyed.
Persistent file storage aside, PaaS is an awesome option for hosting web applications like WordPress. Say goodbye to upgrading (or downgrading) hosting plans, CPU limitations and memory problems. You only pay for what you use and the underlying infrastructure is managed by the PaaS provider.
Do you think PaaS is a good cloud model? Have you ever tried it? Tell us what you think in the comments below.