3 Easy Ways To Install WordPress From a USB Flash Drive
While some actions can be seen as nothing more than “silly WordPress dev tricks.” Installing and running a WordPress site from a USB flash drive isn’t one of them. And as you’ll soon discover, a portable WordPress installation can be incredibly useful in a number of situations.
Why in the world would you ever need to run WordPress from a flash drive?
Shouldn’t this be filed away under “silly WordPress dev tricks” that might have marginal educational value with no real-world application and merit?
Some might think so, but I can think of two scenarios where this “silly trick” proves it has real-world merit:
- You need to work on a WordPress development project locally on more than one machine.
- You want to distribute a copy of a WordPress site without hosting it on a web server.
In these two scenarios running WordPress on a USB flash drive will allow you to have a portable WordPress site for development and demonstration purposes.
To run WordPress you need a web server that offers two things: PHP and a suitable database management system.
Sounds easy enough. There’s a long list of local development servers like XAMPP, MAMP, VVV, WAMP, and others that’ll do the trick, right?
Yes and no.
While all of those options will do just fine when installed on a computer, that’s not what we’re trying to achieve. PHP and MySQL packages must be designed to be WordPress portable in order to be installed on a flash drive.
Upon conducting some intensive Google research, we’ve identified three server platforms that meet the minimum requirements to run WordPress, and can be installed and run from a flash drive.
These are: Portable XAMPP, Instant WordPress, and UwAmp.
And in this article we’re going to show you how to set each platform up and which gets our vote as the best for running portable WordPress from a flash drive.
It’s also worth pointing out all three of these options are compatible Windows, but only one is compatible with Mac.
Continue reading, or jump ahead using these links:
- Portable XAMPP (Windows Only)
- UwAmp (Windows Only)
- InstantWP (Windows & Mac)
- So Which Server Platform Comes Out On Top?
Portable XAMPP (Windows Only)

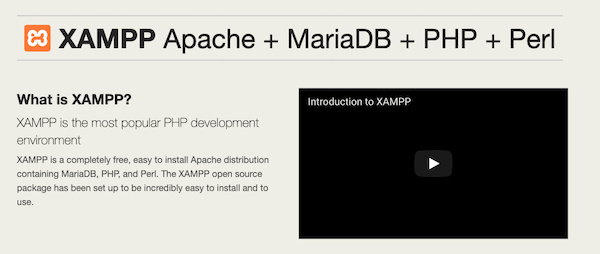
XAMPP is the most robust and complete development system on this list and is primarily designed to be installed directly on a computer.
As a result, the documentation available to help you get XAMPP set up on a flash drive is limited.
Actually that’s a lie. It isn’t limited.
There’s no documentation for installing XAMPP on a flash drive whatsoever. Just a scattered assortment of StackOverflow discussions and tutorials on blogs across the web.
Never fear. The Installation is pretty simple.
To run XAMPP on a flash drive, you have to download the portable or lite version of XAMPP, rather than the standard edition.
First, head to the Apache Friends download page and select More Downloads.

Next, select XAMPP Windows to bring up a list of the available versions of XAMPP.
Choose the version of XAMPP you want to install, keeping in mind that the version name (7.1.32 for example) refers to the version of PHP that ships with that edition of XAMPP.
Once you’ve selected a version of XAMPP, you’ll be presented with a few different download options.
Select the downloadable file that includes “portable” in the name and ends in “.exe.”

Once the file has downloaded, find it and run it.
When you run the installation, be sure to select your flash drive as the installation location.
Since we’re installing three different web servers on this particular drive, we created a new folder to install XAMPP.

Once XAMPP is installed on the flash drive it’ll work just like a desktop XAMPP installation.
Next let’s install WordPress.
With XAMPP started and both Apache and MySQL running, to install WordPress you just need to do five things:
- Access phpMyAdmin by going to http://localhost/phpmyadmin with XAMPP running and create a new database.
- Drop a fresh WordPress installation into the XAMPP htdocs directory on your flash drive.
- Edit wp-config.php to tie WordPress to the database you just created.
- Edit the
max_execution_timesetting in php.ini. The default value is 30 seconds. Since you’re going to be writing and fetching contents from a USB drive, bump this value way up. At first we used 120 seconds, but after exceeding that value while installing WordPress, we bumped it all the way up to 600 seconds. After adjusting this value you’ll need to restart MySQL and Apache to ensure the new settings take effect. - With those four steps completed and both Apache and MySQL started, point your browser at “http://localhost/directory_where_you_installed_WordPress” to run the WordPress installation script.
If you need detailed instructions on installing WordPress or editing PHP settings, our previous tutorials on installing WordPress locally and troubleshooting common XAMPP issues will give you the details you need.
Once you’re done, you’ll have portable WordPress and a XAMPP installation set up on a USB flash drive which you can use on any Windows machine.
UwAmp (Windows Only)

Similar to XAMPP, UwAmp is designed to be an easy-to-use server.
It’s a fully fledged PHP development environment you can use for WordPress, or to work with any other PHP and MySQL application.
One really nice feature UwAmp has is the ability to download, install, and run different versions of PHP automatically from the UwAmp control panel.
FREE EBOOK
Your step-by-step roadmap to a profitable web dev business. From landing more clients to scaling like crazy.
FREE EBOOK
Plan, build, and launch your next WP site without a hitch. Our checklist makes the process easy and repeatable.
Developing with the same version of PHP that will run on the live web server is always a good idea and UwAmp makes that easy.
We can also see this feature being particularly useful for plugin and theme developers who need to test their products using a variety of different versions of PHP.
The installation process is also simple.
Head to the UwAmp website, select Download, and then select Download Exe/Install.

Once the download has completed, find the downloaded file and run it, making sure to select your flash drive as the installation location.

Once installation is complete, open the folder where you installed the application and look for “UwAmp.exe.”
Select and run this file to launch the UwAmp control panel.

If you’ve worked with XAMPP, WAMP, or any other local development servers before you’ll recognize a lot of the options available in the UwAmp control panel.
Here you can access phpMyAdmin, review and adjust PHP settings, start and stop MySQL and Apache, and more.
Installing WordPress on UwAmp is exactly the same as installing WordPress on XAMPP.
- From the UwAmp control panel, select the document icon next to PHP Config, locate the max_execution_time setting, and increase the value from 30 seconds to something larger. Based on our experience running XAMPP from a flash drive we went with a value of 600. Save the file, close it, and UwAmp will automatically restart MySQL and Apache so that the settings take effect.
- Select PHPMyAdmin, use root as both the username and password to log in, and create a new empty database.
- Drop a fresh copy of WordPress into the directory at YourFlashDrive:\UwAmp\www.
- Edit wp-config.php using the name of the database you just created and the associated username and password (use root as both the username and password if you did not create and assign a user to the database when you created it).
- Point your browser at “http://localhost/directory_where_you_installed_WP” to launch the WordPress installation script.
And that’s it.
You now have WordPress and UwAmp installed on a USB flash drive, ready to run on any Windows machine at a moment’s notice.
InstantWP (Windows & Mac)

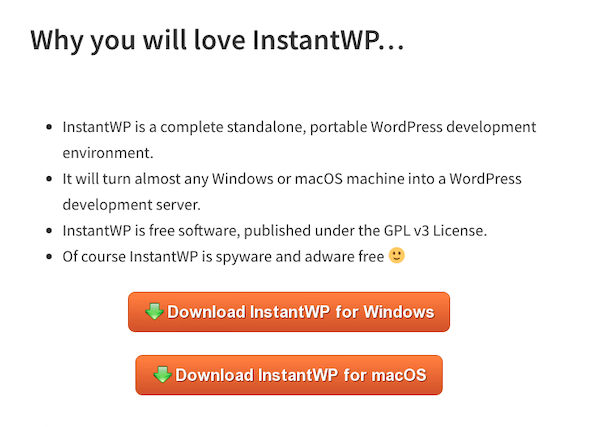
Instant WordPress is a purpose-built solution for powering portable WordPress from a USB flash drive.
Created by a WordPress educator, the purpose of InstantWP is to make it as easy as possible to run WordPress from a portable storage device.
Now since Instant WordPress is the only purpose-built solution we’re talking about, you’d think it should be the clear-cut winner.
Let’s find out.
To get the application head to the InstantWP website and click the download link for Windows or Mac.

Once the installation file finishes downloading, copy the downloaded InstantWP zip into the desired folder (in this case, the folder on our flash drive).
Then unzip the InstantWP zip file using a standard Mac or Windows archive utility.
Once you’ve done that, open up the unzipped folder. Double click on the Start-InstantWP file to start InstantWP.
The InstantWP Control Panel should start up after the progress bar completes.

From the dashboard, you can launch the WordPress site homepage or admin login page, manually install plugins and themes, access phpMyAdmin to manage MySQL databases, and access the documentation.
Each Instant WordPress installation is also completely self-contained. So you can rename the InstantWP folder anything you like and install additional copies of InstantWP.
This allows you to run multiple websites from the same flash drive without ever setting up a database, adjusting PHP settings in php.ini, or manually editing a wp-config.php file.
So Which Server Platform Comes Out On Top?
Each of these options comes with its own set of pros and cons.
XAMPP is the heaviest of the three and the most complex to set up and configure.
However, it’s also the most capable if you plan to do anything other than WordPress development. XAMPP is a complete solution for experienced developers who want to work on WordPress, but who also want to work on other PHP or Perl applications.
UwAmp is a great PHP and MySQL package, and the ability to pick between PHP versions and then adjust PHP settings and trigger an automatic reboot of Apache and MySQL is a really nice touch.
But like XAMPP, UwAmp is heavy enough that it sometimes bogs down and runs slow from a flash drive.
Despite the sometimes sluggish performance, UwAmp can be a great solution for WordPress developers who want PHP, MySQL, and nothing else.
Without a doubt, Instant WordPress is the easiest to install, easiest to set up, and offers the smoothest performance when running from a flash drive.
The downside is, the version of WordPress installed with InstantWP comes with a handful of preinstalled plugins, which will turn off some developers.
In addition, this platform is only good for WordPress development.
So if you want to do anything other than fairly standard development with WordPress, it may not be up to the task.
But InstantWP is ideal if you want a plain portable WordPress development environment that’s simple to set up.
With All This Said, We Have To Declare The Winner…
In our books, UwAmp is the best choice.
While it doesn’t run quite as fast as InstantWP, we were a slightly turned off by the pre-configured flavor of WordPress that ships with it.
UwAmp also has two really great features that the other options lacked:
- A server reboot process that starts automatically when a change is made to PHP configuration.
- The ability to change to any PHP version with ease.
But if you want to run WordPress from a USB flash drive all three of these platforms are viable options.
The best option for you will largely depend on your development needs and preferences.
Tags:

Jon Penland Jon manages operations for Kinsta, a managed WordPress hosting provider. He enjoys hiking and adventuring in northeast Georgia with his wife and kids when he isn't figuring out the ins and outs of supporting WordPress-powered businesses.